HDR photography
HDR means High Dynamic Range photography. It refers to a method of capturing a larger range of light detail than is possible with a single exposure. This article will look at the technique of multiple exposure capture with a DSLR.
Small Group Ice Caving
Highlights and Shadows
The idea behind an HDR image is that you are able to retain details in the highlights and in the shadows. On a single exposure, the shadow detail is lost (black) or the highlight detail is blown-out (white). By carefully controlling your exposures, you should be able to prevent losing shadow detail and blowing the highlights out by taking a range of exposures. The first concept to consider is the use of your histogram data on your camera display screen.
A histogram display the range of light values across a given range. You can select histogram data by using the ‘info’ button on your camera when you are viewing the image. For this demonstration we will look at the histogram generated when you adjust the levels in photoshop.
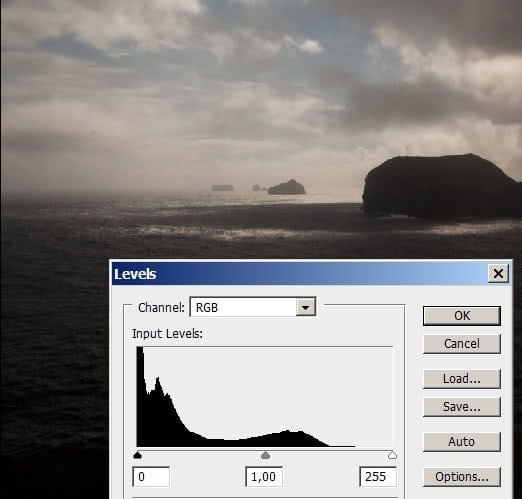
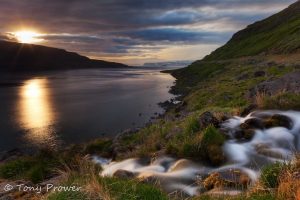
This exposure was taken deliberately under-exposed to capture the detail in the highlights. You will see that there is detail in the brightest parts of the sky. The foreground grass is very dark almost black, I have lost the shadow detail here. The histogram tells me exactly this without having to study the picture. The left side shows the shadow detail and here you can see that there is too much black and therefore the shadow detail is lost. The right side shows the highlight detail and you can see that there is a gradual decline in light values before it reaches the end of the light range. this is great, but it suggests that I could have exposed the image a little longer and still retained the highlights.
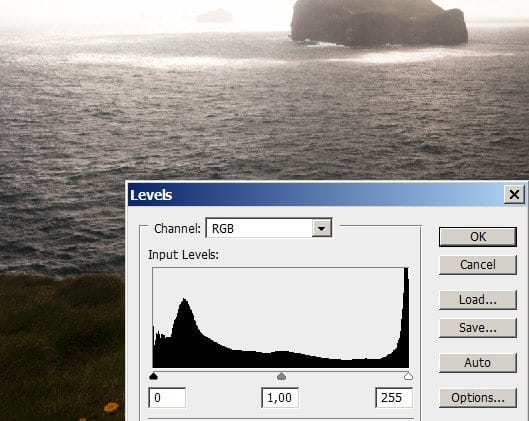
This was the brightest of my 3 exposures. You can see from the histogram that there are too many light values at the right side meaning that the highlight detail is lost. Some shadow detail is also lost, but there is enough detail for my purpose.
Technique
Use a sturdy tripod. The sturdier the better as any slight movement of the camera will give you unwanted results. If you want to capture a basic dynamic range, I would recommend using the bracketting feature on your DSLR. Your camera should be able to take a range of 3 different exposures with a 2 stop difference. This should be fine for most situations where there is not an extreme difference in light values. The benefit of using the camera’s auto-bracketting feature is that the 3 exposures will be taken very quickly and you don’t have to touch the camera in-between exposures. This reduces the risk of jogging the camera slightly which can ruin your shot.
Take the three exposures and check the histogram data for the brightest and darkest exposures. Ideally, you will want the brightest exposure to show no value on the left and the darkest exposure to show no values on the right. You may want to take the exposures again and make adjustments according to your histogram analysis. If you analyse the histograms of my dark and light exposures, what adjustments would you make?
In extreme light conditions such as where you have the sun in the frame of you are taking the picture from inside a building looking out, you will need to take more than three exposures. This might mean taking three over exposed shots with auto-bracketing and then reducing the exposure time and taking another three auto-bracketed shots. The trick is to make the adjustments without jogging the camera. If you can do this with a cable release, you will get better results.
